Photo by Unsplash


Crafting has many wonderful benefits. For example, crafting reduces stress by giving our minds a break. Crafts we really enjoy induce a state of relaxation, boost happiness, improve mood and can help with trouble sleeping. Some people use their crafts to help others, like those making masks for frontline workers. Others find they can make a living (or at least some extra cash) by selling their craft, like knitting, art or music. While not just anyone can make a living with their hobbies, everyone can experience some advantages just from having one. 


Looking for a new craft but aren’t sure you have the right skills? Look no further! This DIY crafting tutorial and project list has something for everyone.


Home Improvement


Art


Music


Sewing


Gardening


Mental Health


There are so many wonderful craft and DIY projects you can begin regardless of your skill level. You can make—and even sell—knitting, sewing, crocheting and other objects. Even if you haven’t fully developed these skills, don’t worry; just keep practicing and you’ll get there. Crafting of any type can be an exciting and rewarding challenge.

Photo by Unsplash


One of the many pleasures of building boats is knowing how much fun you can have on the water. The style, design and materials of your boat all play a role in that, but it also comes with responsibilities. Whether you’re building a small boat or planning on sailing the open seas, safety should be your number one priority. Here are five DIY projects that can help you stay safe on the water. 


Create proper storage for safety equipment

Safety equipment on a boat is essential for surviving an accident or emergency. Be sure you build in proper storage for safety items like life jackets, first-aid kit, a tool kit, a horn or whistle, flares, a fire extinguisher, a marine VHF radio, an extra dock line or two, and a throwable flotation device. The storage needs to be both secure and easy to access. Devote your next weekend to a storage-building project like:


Build the Right Size

You need to pay close attention to the size of your boat for safety reasons both during construction and on the water. The Internet is ripe with downloadable plans to build a motorboat, fishing boat, sailboat or any other kind of pleasure craft.


If you are building the boat alone, and plan on also using it alone or with a few guests on board, stick to around 34 feet for a sailboat or a motorboat. If you have help building and want something slightly bigger, it’s easy to go up to about 40 feet. For DIY boats larger than this, be sure you are an experienced craftsman with a few boats already under your belt (and still above water).


Finally, consider the trailering capacity of your car or truck and the space you have in your garage. These are important but often overlooked considerations when building a boat that you can store and transport safely.


Know the safety needs for your lifestyle

No matter what boat you’re floating in—classical or modern, monohull or multihull, a boat made with wood, glass reinforced plastic, steel or aluminum—it’s important you understand your specific safety needs. 


First, be sure you are building the right boat for your needs. For instance, how many people will you regularly be boating with? The boat you build must be able to safely carry that capacity. Too many people on board will become a fast safety risk—and one that can be deadly. The materials you use to build the boat can directly impact capacity safety.


Next, what kind of activities will you do on your boat? From fishing to skiing, most boats can multitask, but when it comes to building a safe boat, keep your primary activity in mind. Sleeping is another activity to consider. Not everyone wants or needs a cabin, but if you like to sleep with a roof over your head—or just need respite from the hot sun—some kind of shelter is a good idea. And remember, cabins aren’t just for the big boats! Even boats as small as rowboats can be built with comfortable sleeping quarters.


Stick to the plan (and if you deviate, be sure to get help) 

It might be tempting to make major modifications to your boat building plan, but if you aren’t careful—and intentional—your changes could be a danger to yourself and anyone aboard your boat. If you are building a boat based off of a specific plan or kit, be sure to stick to the original plan unless you absolutely need to deviate from it. In that case, for beginner boat builders, consider reaching out to the plan or kit designer to ask about your modification needs. Many of them provide technical support, even for free plans. You may even be able to run your new specs by them and get their feedback.


Use the proper tools properly 

For most boat building projects, you’ll need:

  • electrical alternative jigsaw
  • sturdy scissors
  • safety self-protection gears (gloves, glasses, masks, and so on)
  • a set of pliers
  • several disposable paint brushes
  • several disposable rolls for paint roller
  • staples and a staple gun
  • electrical planer
  • clamps (a good amount, small, medium and large)
  • some cutters with disposable blades
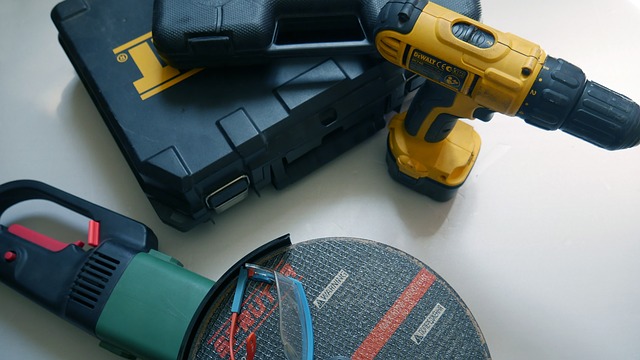
  • battery operated drill/screwdriver and drill bits (one set for wood and one for metal drilling)
  • hammer
  • sanders (a random orbit one and a sheet one)


It’s important you not only have the right tools for your building materials, but that you also understand how to use them safely. There are many YouTube videos you can watch to familiarize yourself with various aspects of boat building, power tools and DIY carpentry tutorials.


Building a boat can be a very rewarding challenge. If you make safety a priority, then it won’t become an issue while you build and when you boat.


Photo: Pexels


No matter where you live, natural disasters are a concern for most homeowners. Even when a home is left standing after a major weather event, families are often left with a list of repair projects to fix their abodes and clean up their outdoor spaces. Many home-repair jobs are best left to the professionals — like those involving structural repair or electrical work — but the good news is that there are a lot of DIY projects you can take on to help your home look and feel as good as new. Our guide discusses the home repairs homeowners can make without the help of a pro after enduring natural disasters such as :


  • Hurricanes
  • Floods
  • Tornadoes
  • Hail
  • Blizzards


While these projects are simple repair jobs for most homeowners — even those without a lot of DIY experience — be sure you have complete confidence in your skills before beginning any task. Taking on a to-do item only to realize it’s above your ability level could cost you a lot in terms of time, money, and frustration.


Trim or Remove Damaged Trees and Shrubs


Landscaping that has been ravaged by strong winds, torrential downpours, or heavy snow not only detracts from your curb appeal, it can create safety hazards and additional damage to your home. If it’s safe to do so, trim back any branches that have fallen or are at risk of falling from trees, especially any that are dangerously close to your home. Keep in mind that branches that require a ladder to reach should be addressed by a professional tree trimmer, especially if you’ll need to use power tools to remove them or if they’re located near power lines.


It’s also a good idea to remove or replant any shrubs that have been uprooted. Other than tripping hazards, they may not pose a safety risk, but exposed holes in your yard could collect water and lead to flooding in your landscape if left unaddressed. 


Learn how to care for storm-damaged trees here.


Replace or Reseal Your Door


If any of your exterior doors sustained damage during a storm, you should replace them immediately. In most cases, this is a simple DIY project. If the sealing around your door has been loosened or removed, you can also easily repair it without the help of a pro.


Learn how to replace a door here and how to seal an exterior door here.


Reseal Your Windows


While window replacement is a job best left to the pros, resealing windows that were shaken loose during turbulent weather is a relatively DIY-friendly job. If you’ve recently experienced a weather event with strong winds, including a hurricane or tornado, it’s worth checking your windows’ seals, even if they don’t appear to be in disrepair.


Learn how to seal your windows here.


Replace Roof Shingles


When it comes to worst-case scenarios for homeowners, a damaged roof is high on the list. A full-scale roof replacement isn’t a DIY project, but replacing a few loose or broken shingles is for many. However, if you’re concerned about post-storm damage, it’s a good idea to have a professional roofer do an inspection, especially if yours is 15 years or older.


Learn how to replace roof shingles here.


Repair Leaky Gutters and Downspouts


Most gutters — especially those on older homes — are easily damaged or even pulled off in extreme weather conditions. Replacing them is a tedious and time-consuming process that’s worth the expense of hiring a professional to handle. However, if you notice leaks or if the seaming has come loose, you can mend your home’s gutters on your own, in most cases. If you have a multi-story dwelling, consider calling a pro for the job.


Learn how to repair gutters here and how to mend gutter seams here.


Replace the Siding on Your Home’s Exterior


It’s not only disheartening to see vinyl siding on the exterior of your home mangled, but it also makes way for other damage. It’s wise to leave major repairs to professionals, but most homeowners can repair a few broken panels on their own.


Learn how to replace damaged siding here.


Repair Damage on Your Deck


Heavy rain, snow, and even wind can take a toll on wooden decks. Whether you need to replace a few damaged pieces of wood or restain or reseal yours, you can take care of mending a deck that’s seen better days, even if you’re not an experienced DIYer.


Learn how to replace broken deck panels here and how to seal a deck here.


Replace Damaged Sprinkler Heads


Replacing sprinkler heads is a simple DIY project no matter your level of expertise. Keep in mind that replacing sprinkler lines is a bit more complicated, because it involves digging up and replacing the grass in your yard, so leave extensive repairs to professional installers.


Learn how to replace broken sprinkler heads here.


Projects that Require Professional Help


After a major storm, it’s a good idea to call a specialist to evaluate any damage and offer a quote to make repairs, even if you’re an experienced DIYer. Not only will they alert you to any dangerous elements you may not be aware of — such as downed power lines — they may offer you a price that makes it worth offloading part of your to-do list.


In addition, be sure to hire a pro for any of these projects:


  • Electrical work
  • Structural work
  • Major plumbing repairs
  • Extensive roof repairs or roof replacement
  • Tasks requiring you to stand on a high ladder while working
  • Projects that use power tools you’ve never worked with before


Safety should be your main focus before, during, and after a natural disaster, but once the storm passes, there are a lot of DIY measures homeowners can take to repair damage to their dwelling. Only take on projects you’re confident (and comfortable) working on, and be sure to reach out to a professional for large-scale tasks and those that include dangerous elements.


Photo courtesy of Unsplash


A friend of mine recently completed a home remodeling project, rewiring all of her electrical outlets completely on her own—without help from professionals. After she completed her solo DIY project, I asked her how it went. “Oh, I’m so proud,” she enthusiastically replied. “I actually managed to fix all but one of the electrical outlets on my house! I only shocked myself a couple times. What’s even better is that I actually lived to tell about it!” She was only half joking with that last part. 


Experts estimate that over 50,000 electrical fires occur in the home annually, resulting in more than 1,400 injuries and close to 500 deaths. Let’s not forget the total amount of residential property damage sustained by the fires—over $1 billion, to be exact. When you look at these statistics, you can consider my friend lucky.


If you’ve been planning a DIY home renovation, you’ll want to proactively consider a few things before you get started on your new project:


Assess your skill level
Before embarking upon any new project, you’ll want to consider: Have you done this before? Do you have the required skills and knowledge? To keep yourself from getting burnt out with home renovations, experts also recommend that you try to stick to just one upgrade per month at the maximum. 


What’s the purpose of the DIY project?
Are you trying to increase your home’s value? Are you trying to save money? Or are you simply taking on a new hobby because you enjoy the work? It’s helpful to start with getting clear on your goals before starting a new project—especially if you are going to be doing all of the work yourself.


What to expect from your DIY projects
If you are looking to increase the value of your home (and, hopefully, save money doing it), there are some projects that might be better suited than others. Upgrading electrical outlets, as in my friend’s case, is one great example. Some other projects to consider might include updating the guest bathroom over a long weekend, installing a fence around a backyard pool, or landscaping the front yard.


When to call a professional
“Do It Yourself” doesn’t mean you have to do it all by yourself. There will be some times along the way that you’ll want to reach out to professionals. For instance, my friend did have a professional electrician inspect her home for safety hazards prior to starting her project, and she still plans to hire a contractor to repair the remaining outlet she was unable to fix. Regardless of your type of project, you may also want to consider hiring help to move items to and from storage.


There you have it. With some proactive planning, and the willingness to call professionals for help if you need it, your DIY dreams are indeed quite possible and, most importantly, safe to achieve. By following the above tips, you can create a home where you don’t just live—you thrive.

curb appeal to help your home sell

When it comes to grabbing the attention of serious home buyers, your home’s exterior is just as important as the interior. When buyers first see your home, even before they step out of their car, you’ll want them to be impressed. As they scroll through online house listings, you’ll want your home photos to leave potential buyers feeling intrigued. Otherwise, they won’t be sold on the inside of the home, no matter how amazing it is. That’s why curb appeal is considered to be one of the most crucial home staging tasks.

Luckily, it can also be easy and surprisingly affordable to spruce up your home’s exterior! Here’s how:

Paint the Front Door

The front door is like a welcome mat to your home. A front door that is old, damaged or dingy does not feel very welcoming. Fortunately, it’s pretty simple and budget-friendly to give any front door a facelift. 

  • Update your doors with a splash of paint to cover any knicks, dings, chips and peeling paint.
  • Look at the color trends. Many homebuyers love a bold red or blue door with flower pots or other decor nearby.
  • Add a smart doorbell with a camera to impress house hunters with extra security features.

Add Color With Flowers

Flowers add personality to your yard, making a home’s exterior literally come alive. Fortunately, you don’t have to create new spaces for flower beds. Most front yards already have areas that are naturally well-suited for inexpensive flower beds. For instance, you might plant a flower garden

  • In a ring around the base of a tree.
  • Lining paths and walkways.
  • In front of porches.
  • Around shrubs and bushes.
  • In flower boxes under windows.

Use Mulch in Your Flower Beds

Mulch keeps moisture in the soil, suppresses weeds and cools the ground during hot, humid weather. However, mulch also has another important function: it can seriously enhance your curb appeal. Here are some benefits of mulching around your home:

  • Adding color to your yard. Black mulch will make green plants stand out, while brown complements exteriors with red brick. Homes with soft, neutral tones often see improved curb appeal with red mulch.
  • Bringing in depth: Adding mulch can make your yard look larger and fuller by creating depth and dimension to gardens, flower beds and other areas. 
  • Creating neatness: Mulch in flower beds that line walkways, circle around trees and in front of porches help your yard look like it was designed by a professional landscaper.

Keep Your Lawn and Shrubs Trim

Simply maintaining your lawn on a regular basis can do wonders for curb appeal. If you aren’t living in the home, it can be easy to forget or fall behind on this kind of maintenance. However, routine maintenance is essential if you want to get your asking price. 

  • Mow the lawn regularly.
  • Rake leaves and remove fallen limbs and other debris. 
  • Pull weeds.
  • Clean gutters.
  • Trim trees and shrubs

Update Your Mailbox and Address

Were your mailbox and address numbers hung the day the house was constructed? Depending upon the age of your home, chances are high that a few styles have changed since then. You’d be amazed at what a big improvement these two small changes can make!

  • Update address numbers: Switch out those cursive black numbers that date back to 1975 with fresh, stylish modern numbers. Many house hunterssay they are drawn to monochromatic, sans serif numbers.
  • Install a new mailbox: Replace a damaged, broken or unappealing mailbox with one that is new, functional and fun. It may seem like an unimportant detail, but it really is a simple change that can add significantly to your overall aesthetic.

However much effort you need and want to put into your home, curb appeal will have far-reaching effects on your home’s appearance and interest. Find what works for your area, home and interests. Be sure to start sooner than later to create a gorgeous space that’s inviting and exciting! 

DIY home projects to help your house sell

Having a home on the market means your house needs to be kept in show condition at all times. That is not an easy feat. Keeping your property spotless is hard enough, but going the extra mile to make it stand out— that takes some creative planning. Check out these seven unique projects you can do on your own to help ensure your home has a major impact on house hunters.

DIY Homemade Air Fresheners

People are very sensitive to scents, which is why it is important that your home have no distinct or pungent smells. However, you do want to keep the air fresh and light, so having some kind of all-natural air freshener on hand can be helpful. A spritz of essential oil in each room is an easy way to add a touch of scent to the air. Simmer pots can fill the whole house with hints of herbs and fruits. For small spaces, a simple opened jar of baking soda is often enough to eliminate any unwanted odors.

Virtual Home Tours Via Zoom

These days, many house hunters expect a virtual home tour before they’ll ever step foot inside your home. Consider showing your home through a video conferencing platform like Google Hangouts, Zoom, or Skype. Buyers can virtually see each room, asking questions and getting a detailed experience of the property to help them decide if a physical walk through is necessary.

DIY Curb Appeal

Your front door is more than just the entrance to your home, it is the centerpiece of a good or bad first impression. Even if you don’t have the budget for a major outdoor overhaul, you can make a few hundred dollars go a long way to improve curb appeal. Keep your lawn neat and trim. Add pops of colors with a few flower beds and trim back any trees and shrubs that are getting out of hand. Another big improvement that is often overlooked— modern, updated address numbers

Chalkboard Messages

Generate excitement about your listing by encouraging visitors to leave a note on a small chalkboard placed near the entrance to your home. Ask them to write what they like most about the property or leave a message about their experience on the tour. Think of it kind of like a guest book— a way for people to let others know what kind of gem they have found. You might also leave fresh-baked cookies beside the chalkboard as a sure way to make a lasting impression — and make your home smell delicious!

Seasonal Photos

Whether you are selling your home or trying to find prospective renters, you can quickly turn interest into action by setting out photographs of your property during various seasons. You can print some simple images of your home and put them in nice, decorative frames prior to tours. Go the extra mile by showcasing your property in different seasons, so house hunters get a good idea of what to expect summer, winter, fall and spring.

Pre-print the Paperwork

Instead of relying on people to complete paperwork when they get home, encourage them to get a head start on sealing the deal (and beating out the competition) by printing those documents in advance. Provide applications, financing options and all documents relating to the house, like inspections, appraisal reports and warranties, near the front entrance during home tours.

Whether your property has been on the market for three weeks or three months, if you’re feeling stagnant, thinking outside the box can help get more movement on your home. Try out one or more of these unique ideas to help get the offers rolling in. 

Photo: Pexels

Home accessibility is important for every member of your family, but it’s a critical element of comfort and safety for those with physical disabilities. Paying attention to layout and making investments in features that make it easier for those who use wheelchairs or walkers will not only provide more mobility, but also help them stay safe and feel more at ease in their surroundings.


While there are a lot of major renovations you can make to improve your abode’s accessibility, there are a lot of DIY-friendly projects handy homeowners can take on themselves. We’ve broken down the do-it-yourself tasks you can add to your to-do list by the different areas in your home you’ll need to address — as well as the home-accessibility projects you should always leave to the pros.
 

Outside

Replace gravel walkways with concrete or stone. Gravel is a tough terrain for people using wheelchairs and walkers to traverse. Removing it and replacing it with a smoother surface is a tedious to-do item, but it will make a huge difference for a loved one with a disability.


Smooth out broken or uneven sidewalks. Adding a new layer of concrete is a simple fix for walkways on your property. To mend city sidewalks that line your yard, you may need to contact your local government.


Add raised flower beds to make gardening simpler. Building raised planters will make growing a garden much more comfortable for those who have difficulty lowering themselves down to ground level.


Add ramps to entrances. Building a wheelchair ramp is a surprisingly DIY-friendly project, but if it seems like too big of a task to take on, hire a professional.


Build a covering for an open driveway. If you don’t have a garage, build a carport or another structure that will protect your loved one from the elements while they get in and out of the car. If possible, create a covered walkway that leads from where you park your car to your home.


Move the mailbox next to the entrance of the home. This prevents the need to go to the end of the driveway to grab the mail each day.


Add a lower peephole to your front entrance. That way, every member of your family will be able to see who’s at the door. You may even want to consider adding a video doorbell, which allows homeowners to see visitors via their smartphone.


Bedroom

Replace furniture to accommodate the disability. Wheelchair users will benefit from a bed that sits lower and a desk with a wide opening that easily fits the wheelchair. Those who use walkers may benefit from a higher bed and a raised desk chair, since they won’t have to lower themselves down as far as with low-level models.


Lower hanging rods in closets. This will make getting dressed and putting away clothes easier for those who use a wheelchair.


Add grab bars next to the bed to make getting in and out easier. Grab bars will make this process safer and more comfortable.


Make communication easier with walkie-talkies. Should a loved one need help but it’s difficult for them to leave the bedroom, having a direct mode of communication with other members of the household is a huge convenience.


Move the bed and other large pieces of furniture against the walls. This will create a more open layout that’s easier for wheelchair- and walker-users to navigate. You can also downsize the furniture to take up less space.


Bathrooms

Install grab bars. They should be placed next to the toilet, near the bathtub, and in the shower.


Add a shower seat. These make bathing safer and more comfortable for people with disabilities.


Replace the showerhead with a handheld version. Showering will be much simpler with a faucet your loved one can hold.


Install a toilet riser. These make getting on and off the toilet easier by raising the seat a few inches, and they also have handles on the sides for safety.


Replace round drawer and cabinet pulls with handles. Lever-style door handles are easier to grab from any height, and they’re especially helpful for those who have difficulties with gripping objects, such as individuals with cerebral palsy (CP).


Reverse the bathroom door so it opens into the hallway rather than the bathroom. Doors that open into bathrooms can make mobility difficult for wheelchair- and walker-users, since they take up space. Keep in mind that changing the way a door opens usually also involves changing out the frame.


Replace the bathroom door with a curtain. This isn’t always a necessary project, but it can be extremely helpful for those with serious mobility and safety concerns, like seniors who risk falling. 


Add non-slip flooring. You don’t have to carpet your bathroom, but for individuals who use a walker or move in and out of a wheelchair in the bathroom, falls on slick flooring, like tile, are a risk. Fit the floor with a slip-resistant mat (be sure to secure it to the floor underneath), or replace the flooring with something less slick, like vinyl or cork.


Kitchen

Make the sink more accessible. Removing cabinet doors below the sink will make it easier for a wheelchair to pull up in front of it, and switching to a faucet with only one lever will prevent loved ones from having to switch between knobs for temperature control. Be sure to remove any toxic materials stored under the sink to prevent kids and pets from accessing them, and cover pipes with insulation or keep them otherwise separated to prevent anyone from getting burned.


Add lazy susans to low cabinets and the bottom shelf of the refrigerator. This prevents needing to reach too far into these spaces for items. Keep your loved one’s most-used items within reach as much as possible.


Add low surfaces that make eating and food prep simpler. Advanced DIYers can add low pull-out surfaces to high countertops, but adding a card table to the end of the counter works just as well.


Throughout the House

Add miniature ramps at entryways. Raised thresholds can make moving from one part of the house to another difficult. Place mini ramps over flights containing only a few steps, and even out areas that are slightly raised due to flooring changes or other barriers.


Replace round door knobs with levers. They’re easier to grab no matter an individual’s height or gripping ability.


Create a more open layout by rearranging your furniture. This will help loved ones who use a wheelchair or walker move around more easily.


Remove area rugs, or secure them to the floor. Rugs can make it more difficult for wheelchair-users to move around, and if they’re not secured to the floor, they’re even more difficult to cross and present tripping hazards for walker-users.


Widen doorways. This isn’t always a DIY project, but if you have wooden frames in doorways, you can remove them to create more space. Keep in mind that you’ll have to remove doors for this project, so this is best suited for entryways between common spaces, like from the dining room to the living room, rather than bedrooms and bathrooms.


Add wheelchair-level lamps. Light switches may be hard to reach for individuals in wheelchairs, and adding lamps is a DIY-friendly fix.


Add length to pull cords that open blinds and curtains. You can also install a long wand that twists blinds open.


Home Accessibility Projects that Require Professional Help

Due to danger and difficulty, always work with a professional contractor for these home-accessibility projects. Call an expert for help if you’re:


Adding a stairlift or elevator. Both of these projects require structural and electrical work that should only be done by licensed pros.


Lowering countertops. This isn’t necessarily a dangerous project (unless you have counters made of granite, marble, or another heavy material), but it’s a huge undertaking.


Lowering cabinets. This is a big job you’re better off handing over to a professional.


Lowering outlets and light switches. Moving outlets and wall switches to a wheelchair-accessible height is a great way to make your home more accessible, but leave this task to a licenced electrician.


Adding intercoms to rooms. Intercoms in bedrooms, bathrooms, and other frequently-used areas of the home will help reduce the need to move throughout the home for those with extremely limited mobility, but they require electrical work and should only be installed by a professional.


Replacing showers, bathtubs, and toilets with disability-friendly options. If done incorrectly, you could be left with a big mess on your hands.


Making major flooring changes. Unless you have a lot of experience, replacing major sections of flooring is usually best left to a pro. Plus, if you need to change the floor in multiple rooms, professional installers will make sure that everything is even so that there are no barriers that make it difficult to go from one room to the next.


There are a lot of ways to make your home a more accessible space for every member of your family, and many are DIY projects that don’t require a lot of skill or expense. Be sure to reach out to a professional for any project that is potentially dangerous — the added cost will be a worthwhile investment in making your home a disability-friendly place for loved ones of all abilities.


mulch projects to help your home sell

Many homeowners use mulch to moisten the soil in their yards, suppress weeds, and cool the ground. However, there’s more to mulch than you might realize. If you plan on selling your home in the near future, you might be surprised to see how mulch can also make your yard and garden more attractive to potential home buyers.

Thinking of adding mulch to your yard? Here are three tips you should consider before you begin.

Mulch: What do you need it for?

Follow these six tips when laying down mulch:

  • Avoid mounding mulch around your trees. You don’t need more than three inches of mulch, as a general rule. Using more than that can cause bark rot and attract insects.
  • Apply mulch twice a year, two inches in the spring and an additional inch in the fall before the cold winter temperatures kick in.
  • Use mulch made from wood or bark in areas where you plan on digging frequently, like flower beds.

Once you know how you want to use your mulch, then you are ready to make the purchase.

Purchasing Mulch: Making the right choice.

Here the pros and cons of three kinds of mulch:

  • Cypress: This kind of mulch helps retain water and doesn’t need to be replaced as often. It’s also helpful for erosion control. However, cypress catches fire easily and should be used with caution in areas prone to wildfires.
  • Pine Nuggets: With it’s long-lasting beauty, pine is great for aesthetics. They are also larger, which means they are excellent for suppressing weeds. However, pine nuggets tend to float away in heavy rain, so they are better for drier climates.
  • Cedar Chips: With a scent that acts as an excellent insect repellent, cedar is a fantastic choice for plants that attract pests. Cedar mulch is attractive, retains soil moisture, prevents water run off, suppresses weeds and is long-lasting. Cedar mulch is also— as you might expect— the most expensive mulch.

After you purchase the right kind of mulch, you are ready to transform your yard. It’s time to think about the way mulch can enhance your home’s outdoor aesthetics— otherwise known as curb appeal.

Curb Appeal: Mulch adds color and texture

Here are three ways mulch boosts your curb appeal:

  • Adds personality with color: Mulch can add color to your yard (though it is important to remember the color may fade if it rains frequently). Black is a good color for green plants; it makes the color really pop. Brown mulch looks very appealing on homes with red brick. Red mulch is good for homes with neutral tones in their outdoor design. 
  • Creates clean lines: Using mulch in beds along walkways, around trees and near porches can help create strong, clean lines, which makes your yard look more neat and trim.
  • Brings in depth and dimension: Adding mulch brings in levels of depth and dimension to the various plants you have in your beds. Make colorful tulips pop in the spring and bring drama to your evergreens in the winter. 

Once you have finished mulching it’s important to keep maintaining your beds and gardens. That way you can keep your yard healthy and looking good all year long.

Photo: Pexels

If you have a little one with autism spectrum disorder (ASD), you know she faces struggles that many of us don’t understand. Living with a sensory-processing disorder can make the world a confusing and overwhelming place, filled with sights, sounds, and smells that trigger feelings of anxiety or even full-on meltdowns. As a parent, you want to do everything you can to protect your child. While you can’t change the entire world around her, you can help her feel more secure at home — and her bedroom is a great place to start.

There are a lot of DIY projects that will help create a sensory-friendly bedroom for a child with autism, and many don’t take a lot of skills or equipment. Our guide discusses the projects that can make a huge difference in your little one’s safety, comfort, and overall well-being.


Keep in mind that although there are many home improvements you can do yourself that will make your child’s bedroom a more soothing space, some projects aren’t DIY-friendly and require the help of a pro. Always keep safety in mind — don’t take on a task unless you’re completely confident in your abilities to DIY the job.


Paint It a Calming Color


Tranquil, muted hues are great choices for any bedroom, but especially for kids on the autism spectrum. Shades of light blue, pale green, and warm beige help promote a sense of calm during playtime and bedtime, and they’re less stimulating (and less boring) than white. If your child’s bedroom walls currently contain a bold, bright color or a busy pattern, breaking out the paint rollers can help soothe autism symptoms like overstimulation and sleep disturbances.


Rethink Your Flooring


Many children with autism feel more at ease when they touch soft textures. Plus, if your little one is prone to meltdowns, hard flooring can be uncomfortable and even dangerous in these situations. It can be helpful to add soft flooring if your child’s room consists of hardwood or tile, either by adding in area rugs or refinishing the space with carpeting. While it’s easy to add area rugs, only skilled DIYers should add carpeting without the help of a professional, but because it can make a huge difference in your child’s comfort, it’s a worthwhile investment.


Of course, every child is different. If yours seems more at ease on hard surfaces, make adjustments accordingly. Again, replacing flooring isn’t always an easy job for homeowners who don’t consider themselves handy, so it may be best to hire a professional. If your budget doesn’t have room for an experienced installer, there are plenty of online tutorials that can be helpful in adding tile and even hardwood flooring.


Cut Out the Clutter


Being surrounded by clutter is mentally exhausting for anyone, but it can be especially overwhelming for children on the autism spectrum. Implement a storage system for toys, books, and other items to create a more organized environment. You can DIY built-in shelving that’s covered with a curtain to keep it from looking too busy. Color-coded bins are also a great way to store belongings and simplify tidying up after a play session.


Create Stations

A kid’s bedroom serves as so much more than a place to sleep. It’s also where they create, play, and wind down during the day, so try to separate these areas as much as possible. The idea is for sleeping spaces to be secluded from play areas so children aren’t distracted or stimulated when it’s time to hit the hay. Organizing the room while you’re tackling clutter issues is an easy way to add some structure to the space, or you can build room separators to make a large room more compartmentalized.


Adjust the Lighting


Bright lights, both natural and artificial, can cause stress in kids with ASD. Plus, excess light in the evening can be stimulating and make it difficult for children of any ability to fall and stay asleep. To combat these issues, do a lighting audit in your little one’s bedroom, and address potential stressors using these strategies:


  • Switch fluorescent bulbs to ones that emit softer light. Fluorescent light is especially harsh and overwhelming.
  • Consider installing a ceiling fan with a soft light. This will create a comforting ambience, especially in rooms that tend to get too warm. As a bonus, turning an overhead fan on a low setting is usually more sensory-friendly than using floor versions, which tend to be noisy and may blow air directly on a child, which could be bothersome.
  • For rooms that let in an ample amount of natural light, consider adding a floor lamp or two. This way, you can rely mostly on sunlight during the day, and use lamps to brighten things up ever so slightly in the evening as needed.
  • Add curtains, blinds, or shades to windows. You’ll have a quick way to adjust the amount of light coming in both day and night.


Reduce Noise


No one wants their bedroom to let in a lot of noise from external sources, but loud bedrooms can be extremely upsetting for children with autism. There are a lot of easy DIY projects that can help reduce noise, like adding double-paned windows, a more soundproof door, and even blackout curtains.


In extreme situations, it may be helpful to move your child’s bedroom to a different floor. If she’s currently on the first story and too much noise comes in from the street and an upstairs space directly above hers, consider moving her to a higher story.


Add a Safe Space


While you’ll always do your best to be there to comfort your child, it’s helpful for her to have an area that helps her feel secure when she starts feeling stressed. Sensory swings, hammocks, and even bean bag chairs can all be havens for kids who need to decompress, and they’re easy DIY projects (even for beginners!). You can also sew a weighted blanket, which your child can use anywhere in the home when she’s feeling overwhelmed.


Try Aromatherapy


Scent can be a powerful tool in promoting a sense of calm. Aromatherapy using calming aloe, lavender, eucalyptus, or any other scent that makes your little one feel more at ease can be a great addition to their bedroom.


Be sure you’re mindful of safety when adding this element to a child-friendly space. Candles, incense, and even plug-in air fresheners may pose safety hazards for curious kids, but there are ways to incorporate it that involve DIY projects you and your child you can work on together. Consider adding essential oil to wax and making crayons or hand-sewing scent-infused comfort items.


Switch Up the Bedding


It’s important for children to be as comfortable as possible when it’s time to drift off to slumberland. If you’ve taken action in other parts of your child’s bedroom but she’s still having trouble sleeping, her bedding may be to blame, especially if it’s scratchy, thin, or otherwise worn out. Replace her pillows, sheets, and comforter with more soothing options. A lot of children with ASD gravitate to soft, cotton-based fabrics, but let her favorite clothing guide you to the right solution. You can buy premade items, but sewing your own is an easy DIY project. Making pillows is a simple activity for all skill levels, and there are a lot of great online tutorials that will help you create a quilt.


Talk to Your Child About Her Needs


Even young children and those with severe ASD symptoms will be able to communicate their needs to some degree. As often as possible, talk to your little one about what changes would make her feel more at ease, and work to incorporate them. Kids of all abilities feel more secure when they have a say in their environment and routine, and your child may alert you to triggers you didn’t think about.


It’s important for all children to feel safe and at ease at home, especially in their bedrooms, but there are special considerations parents of children with autism should make to give their little ones the comforting space they need. By rolling up your sleeves and spending some time on the DIY projects that will help create a more sensory-friendly bedroom, you’ll give your child peace of mind from sunup to sundown.

DIY home renovations to improve your home value


There are many reasons why the housing market shifts. In some ways, it’s as simple as supply and demand. Other times, situations that are completely outside of our control, like the novel coronavirus, unexpectedly turn the marketupside down.

If you plan on selling your home in the upcoming months, now is a perfect time to take care of any home renovations you’ve been putting off. For any DIYers who are nowworking from home or taking leave, why not dedicate more time to your home projects?

Whether you decide to sell, rent or refinance your home, here are the top do-it-yourself home renovations to help you boost your home value.

Paint Your Front Door

A fresh coat of paint of the front door is a simple, yet effective way to enhance your home’s curb appeal. Go with a bold or striking color to complement the color and style of your exterior. Update your address numbers and mailbox, especially if those are near the front door, to provide a cohesive look across your entryway.

Finish the Basement

Renovating a basement can be a great way to boost the resale or rent value of a smaller home. You can market a two-bedroom as a three-bedroom or consider it a bonus room, which adds to the square footage. Finishing a basement isn’t a simple DIY project, but it’s totally doable for those with the right tools and a bit of experience.

Keep Up with the Landscaping

At the bare minimum, keep the yard mowed regularly and your trees and shrubs trimmed. A tidy yard can be just as appealing as an elaborately landscaped one. There are many easy ideas that can make a big splash, like adding pops of color with flower pots or spreading mulch and planting flowers around the base of trees and next to walkways.

Design Inviting Outdoor Spaces

People love to gather in outdoor living spaces. Something about the vast sky as your roof really invites both intimacy and group gatherings. Invest in designing an outdoor area with a fire pit or oven on a patio with string lights and bold flowers. Home buyers will easily be able to see themselves enjoying a warm spring night outside their new home. 

Update the Kitchen

Outdated kitchens are one of the leading turn offs according to home buyers. There are many simple ways you can modernize your kitchen. Painting the cabinets and adding new hardware can make a big difference. To really maximize your return of investment (ROI), consider upgrading all the appliances. To really make a difference replace old flooring and update countertop surfaces.

Makeover the Master Bath

The allure of the master bath is very strong. It’s seen as a place of privacy and relaxation. Upgrade your master bath by first updating all your faucets and fixtures. Consider installing a newer sink —vessel sinks and troughs are a big fan favorite — and removing any dated wallpaper, flooring or paint schemes.

Create a Home Office

More and more Americans were already working from home, even before the isolation we’ve endured with the coronavirus pandemic. A home office could be a great project for you right now, especially if you’ll be working from home for the next few months. Converting a spare room into an office helps create defined lines between work and home. Try to use a room that gets a lot of natural light. Create a layout that prioritizes function, while decorating in a way that inspires. 

Renovating your home can increase the property value and make it easier to sell or rent. The changes, upgrades, and repairs you make today might come in handy during the uncertain housing market we suddenly find ourselves in. Be sure you feel comfortable before you tackle a major DIY renovation. Consider the time and cost commitment you’ll be making. Once you are ready, you can really transform the way your whole house feels — even if you only renovate one area.

Photo: Pexels